| > Home > Back To Newsletters Page | |||||
|
| |||||
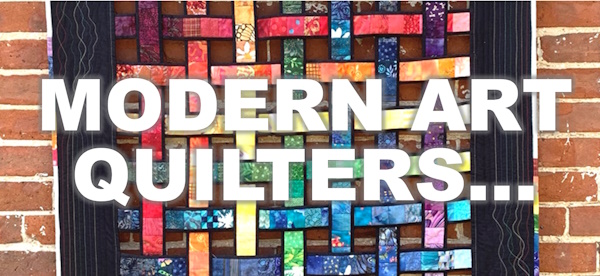
EDGES AND ENDINGSHaving recently finished stitching our entries for this year's Festival of Quilts we were faced with the perennial question of how to finish the edge of each... what a bind! In fact, facing and binding are just two of numerous ways you can finish the edge of a piece of quilting and, over the years, we have probably used all of those shown below.This year most of our quilts had an ordinary, with-the-grain cut, double binding, also known as French binding, machine stitched to the front and hand stitched on the back. Sometimes a double binding is too heavy, for example on a miniature quilt we would usually use a single binding which lies flatter and can be made very narrow. For our entry into the Two Person Category we faced the two separate parts so they would hang together without any sort of delineation between them. You can see a sneaky peek of this joint quilt below left - do come and meet it face-to-face if you are at Festival this weekend. HH and I will be in the Halls on Saturday and Sunday - for once we are actually just coming as visitors - we always seem to bump into online quilting friends while we are at the NEC so do say "Hi" if you see us. We are looking forward to having a chance to have a good look at the galleries and competition quilts, armed with our cameras and notebooks. It is amazing what sort of inspiration can be found in those hallowed Halls. Since part of the aesthetic of Modern Quilting is to eschew the use of borders to surround your quilt, particular attention needs to be paid to how you finish the raw edges of a quilted piece - whatever the size. The rest of the Modern Aesthetic advocates the use of some or all of the following design elements: asymmetric design, no discernible block structure, A change of scale, areas of negative space, low volume fabric choices... the list continues to be amended. In addition to the Modern, Contemporary, Two Person and Miniature, this year we also have entries in the Traditional (HH) and Pictorial (HB) Categories. See if you can spot all nine of our quilts. We are hoping to have a great time at Festival as ordinary punters and look forward to seeing our friends there. Helen Howes and AitchBee Contact us direct on newsletter@modernartquilters.co.uk Why not forward this message to your quilty friends who might enjoy our ramblings. They can CLICK HERE to go straight to our newsletter sign up page. HEADER IMAGE: RAINBOW BREAKS by Helen Howes. Has 90ft of hand-finished binding on the interlaced bands. The borders were made 4 times, as they kept getting too small when quilted Finished the last few stitches about 10 minutes before the carrier arrived to take to FOQ Made for the Quilter's Guild Challenge in possibly 2005, theme was "Rainbow Breaks". The winner was a red and white quilt with ducks... |
|||||||
 FESTIVAL OF QUILTS whether you are an old hand or have never been before - always worth a visit. Click on the image to visit the site, see what's on and book tickets. |
 ISLEHAM QUILTFEST 2024 Cambridgeshire quilt show at the end of the month. We'll be there again enjoying the lovely church venue, super quilts and refreshments. Click on the image for all the details |
||||||
Click on any picture in this Newsletter to read more. These are mostly links to external websites and blogs - have fun and enjoy looking!  |
|||||||
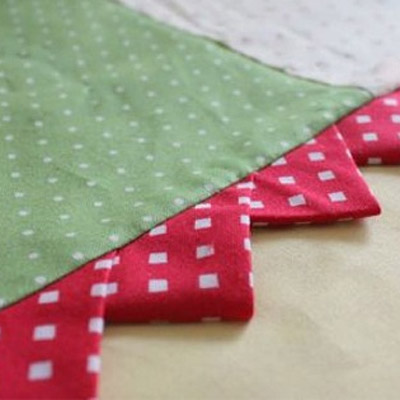 |
Prairie Points are a great textural embellishment to add to any quilt. If you haven't come across them before they are made from squares of fabric which are folded and pressed so all the raw edges are on the long edge of a half-square triangle. This long edge is then trapped in a seam leaving the rest of the triangle loose.
You can also use them to finish a quilt to give a nicely jagged, saw-tooth edge. The link from the photos goes to THE QUILTING DIGEST where they have included several videos showing you how to make Prairie Points, including one on making a continuous strip of points from a single strip of fabric - perfect for an edging! |
||||||
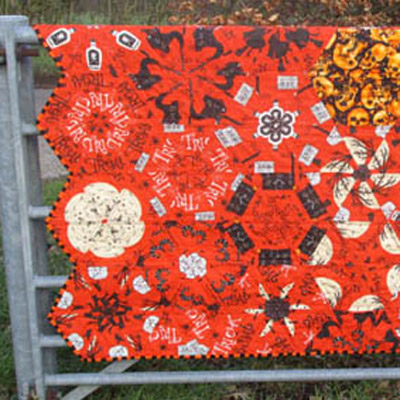 |
It is an item of faith with us that not all quilts have to have straight-edges! That means that corners do not all have to be right-angles and sometimes (sharp intake of breath) you can have internal corners to go round too.
In this tutorial, which appears on the MAQ website, HH shows you - with lots of photos - how to tackle non-right-angles well as those internal corners. |
||||||
 |
Another way of making non-straight edges is with a scallop or wavy edge - another sharp intake of breath - yes, curves! Of course that's what bias binding was invented for.
In the linked tutorial Andy on her blog, A BRIGHT CORNER, shows in great detail how to draft and cut a scalloped edge, including how to make the corners perfectly symmetrical |
||||||
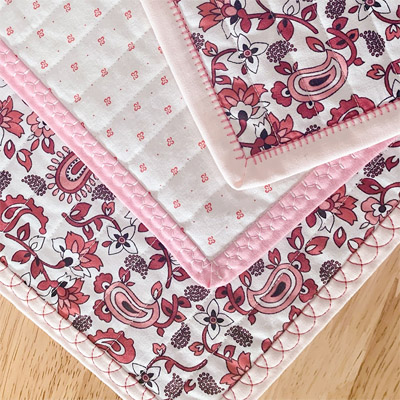 |
Although this link takes you to the BERNINA blog, We All Sew, it is worth looking at even if you don't have a Bernina. Many modern machines have decorative stitches in their memories, and many older machines will do a zig-zag stitch or variations thereof. Even I (HB writes) who treasure my straight-stitch only Juki also own at least three other machines that will do a zig-zag for the occasions when I need one. Adding a line of decorative stitching to your binding may help the edge of your quilt to last longer if you foresee it getting heavy use.
CLICK HERE for a link to the American Quilt Society's blog entry about decorative stitches on the binding. I like their idea that you make a little sampler of the stitches on your machine, with notes about settings written on, so you can choose and appropriate one at any time. |
||||||
 |
Erica of KITCHEN TABLE QUILTING shows how she likes to make a durable binding for her flannel (brushed cotton) quilts, by making her "first fix" seam for the binding on the back of the quilt and then pulling the folded edge to the front and stitching it in place with big stitches in a heavier perle thread | ||||||
 |
Facing a quilt is a very Modern way of finishing an edge. Strips of fabric are stitched to the edge, in a certain order, and the whole strip is pulled to the back so none of it is visible on the front. This excellent article on COTTON AND BOURBON shows you just how to face a quilt.
Facing is also useful for finishing quilts that are not square, although the technique is slightly different, and for finishing miniature quilts where a traditional binding would be too heavy for the delicate design. CLICK HERE for another tutorial on quilt facing by ever popular quilt artist, Cindy Grisdela. |
||||||
 |
And here we are, nearly September and our joint exhibition will be starting soon
Armadillo & Pumpkin Two Textile Artists in search of a Title 10th to 22nd September inclusive 10am to 5pm every day at Merlina Art Gallery Earsham Heritage Mill, Church Road Earsham, near Bungay, Suffolk NR35 2TQ Put the dates in your diary and come to visit for new quilts and old sewing machines. Lovely things to look at and nice things to buy. Check back here for more details |
||||||
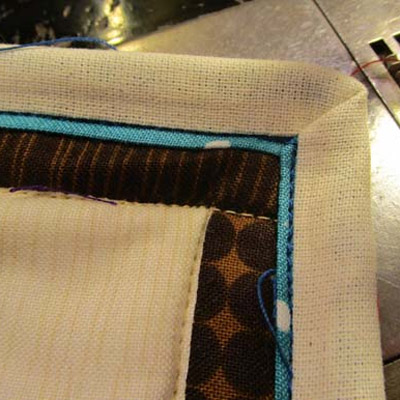 |
One of our very favourite edge finishings is a flange binding. It is similar to a double binding, but it is made from two strips of fabric of different widths joined length-wise and pressed in half so you end up with a little sliver of the flange fabric showing between the binding the the quilted panel.
This link takes you to the tutorial by HH on the MAQ website.
I am particularly fond of this type of binding (HB writes) since it is one of the few kinds that can be stitched entirely by machine and still pass muster in a competition. I can hand sew, and I am good at it, but I would much rather be designing and making the next project than finishing the last! |
||||||
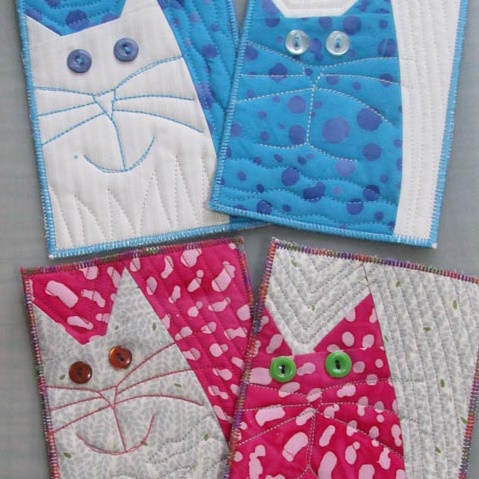 |
When you get right down to the narrowest margins you can always finish the edge of tiny quilted things, like these lovely COUNTERCHANGE CATS postcards by HH, with a tightly spaced zigzag stitch. By going round twice you will create a stable edge for all sorts of small projects which would be too fiddly to bind otherwise. Click on the image to see the full range of Helen's postcard kits.
HB uses this same edge to finish some of her miniature projects. CLICK HERE to see the Miniatures page on her website and have a look at the latest additional to the miniature stable: MINIATURE TRADITIONAL QUILTS |
||||||
 |
Last but not least is the good ol' tried and tested double binding (also known as French binding). You can finish this type of binding by hand or by machine but there is an important difference in how you start these two options:
HAND FINISHED binding is machine stitched to the FRONT of the quilt first. MACHINE FINISHED binding is stitched to the BACK of the quilt first. The link from the image takes you to a very good tutorial on machine binding by Rebecca of Bryan House Quilts. Alternatively, CLICK HERE to visit the tutorial on hand finished binding on the MAQ website |
||||||

|
|||||||
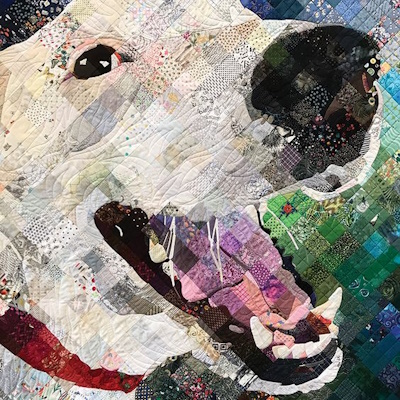 |
So OK, I know it's nothing to do with edges and endings but you have to admit it's a bit clever. This is LADY TEELA OF AMHERST by Timna Tarr.
Having been finding my feet in the world of pictorial patchwork designs recently. I have been looking at the work of the quilt masters. This panel finished at 38 x 38 inches so each of those squares of fabric is about 2 x 2 inches. I love the way Timna has used the patterned fabric to create light and shade. It reminds me a little of the work of JENNY BOWKER - another of my quilting heroes. It is also reminiscent of the colourwash quilts which were in vogue in the 1990s |
||||||

|
|||||||
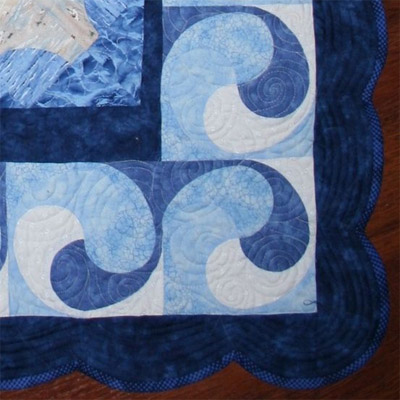 |
Wahhh! More beautiful images to inspire you on this month's Pinterest board, EDGES AND ENDINGS.
Although we have said earlier in this issue that Modern quilts (with a capital Mmmm) should not have borders, we have included some on this month's board, because some of them are just too great to be ignored. Hey, this is quilting, and it's yours, tear up the rulebook and do whatever you want! |
||||||
| Our mailing address is:- 4, The Raveningham Centre, Beccles Road, Raveningham, Norfolk, NR14 6NU. United Kingdom | |||||||